Sunday, September 24, 2017

Lyman Orchards


Lyman Orchards is a location in Middlefield, Connecticut that offers a variety of activities for people to enjoy. They have you pick orchards with fruits such as apples, peaches, and pears, and they also have a pumpkin field. There is a market where you can go and get cider and donuts, as well as a variety of other goodies. There is a hay wagon that will take you up and down the hill to get to the orchard, and there is also a corn maze that you can try to find your way through.
Here are my top 5 tips for if you want to go to Lyman Orchards –

1)      There is a huge hill that leads up to the orchards, you can either climb it or take the wagon up – it all depends on what you are more comfortable with.

2)      There were more apples on the grounds than on the trees, so just be careful of where you are walking.

3)      There were also some holes in the ground so be cautious of that as well.

4)      Wear appropriate shoes in order to keep your feet and ankles safe!

5)      The trees towards the front were pretty bare, so the closer you get to the back, the more apples you will find on the trees.
Here is a link to their website if you want to check it out - http://lymanorchards.com/

Sunday, September 17, 2017

Rule of Thirds

Rule of Thirds is a simple, yet effective way of changing up an image and making the focal point not be in the center of a photograph. This helps to draw the eyes to the subject, and then to the rest of the photograph, instead of just drawing the eyes to the middle. Basically, to achieve the rule of thirds, you want to think of the photograph in 9 sections. Top, middle, bottom, and left, middle, right. Think of it like a grid, you want the lines of the sections to intersect at some point with the subject on the grid. I demonstrate this with the frog photograph below. The frog intersects twice, which is what you want.


Here are my top 2 tips for achieving the Rule of Thirds - 
1) With the rule of thirds, the subject is either on the left or the right. Try to stick with this as it makes it easier.
2) Usually, there is only one subject in the photograph as to not distract the viewer too much. However, you can break this rule occasionally if the main subject is bigger or in the foreground. 

Sunday, September 10, 2017

Floral Photography


Floral is one of my favorite types of photography, as I love to admire beautiful flowers and capture photographs of them whenever I can. Floral photography is perfect in the spring/early summer when all the flowers are starting to bloom. Floral can be used to showcase professional floral arrangements or to showcase a growing garden.


Here are my top 2 tips for floral photography –

1)      Don’t be afraid to get super up close to the flowers, as this can showcase more detail than it could if you weren’t zoomed in.

2)      If you plan to get up close to the flowers, beware of bee’s and bee’s nest, you don’t want to get stung!

Sunday, September 3, 2017

Double Exposure

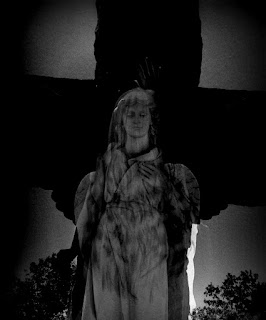
A double exposure is when you essentially blend two different images together to create one (mostly seamless) image. Even though this seems like a really hard project to master – it’s not! The easiest way that I have found to create a double exposure is to use the Picmonkey photo editor. What you do is choose your base image, then go to the left where all the editing tools are and look for the textures tool. Click on that, and then you can either choose your own pattern with another photograph, or you can use one of Picmonkey’s patterns – the photographs I have worked on show a mix and match of my own versus Picmonkey patterns. The Picmonkey patterns are the ones that have the galaxy print on them.


Here are my top 2 tips to achieve a double exposure image – 

1)      When thinking about what images you want to use, you want to make sure they mesh well together. This makes sure that they appear to be one solid image, not two images mixed together. You can see this mostly with the waves photograph above – it appears to be one image but it is actually two separate images.

2)      In the editor, once you have combined your two images, you can move the overlay around a bit if you need to or you can even change the way it appears by clicking on the drop down that appears when you put the second image on top of the base.